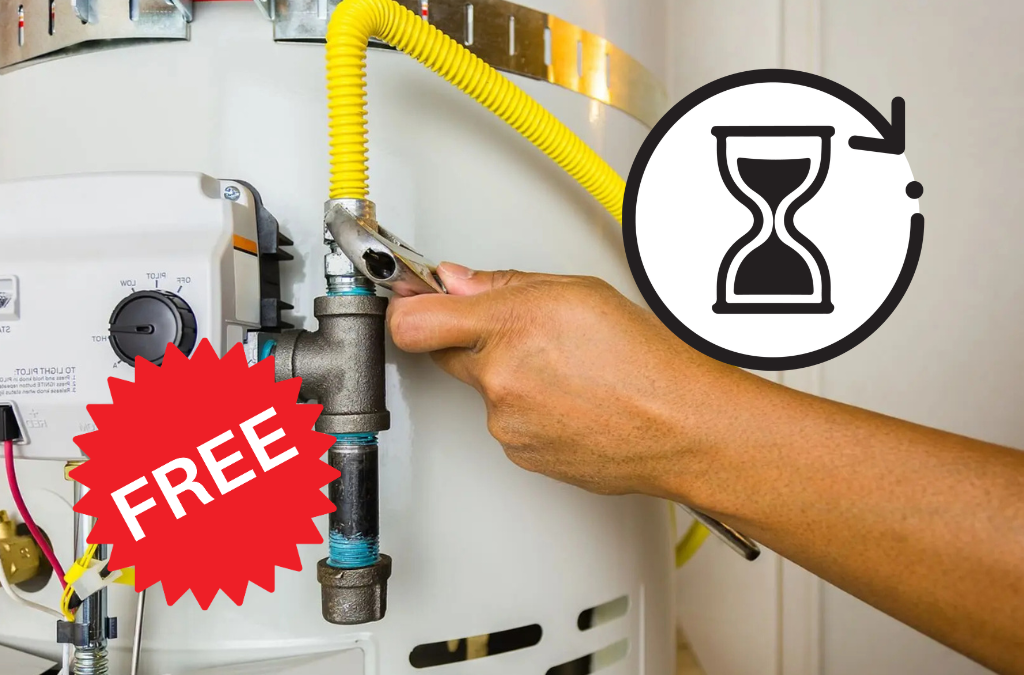
If you’ve seen or heard anything about 3 hours of free power lately, you’re probably wondering whether it’s as good as it sounds – or just another energy company promise that evaporates when you read the fine print.
So let’s cut to the chase: It’s real!
Not just that, it’s already rolling out across parts of Australia (including Queensland!) and the concept is pretty straightforward …
During peak solar generation in the middle of the day, there’s often more electricity in the grid than people are actually using. Sometimes wholesale prices go negative. So energy retailers – nudged by government – are beginning to offer households a midday window where usage costs nothing.
And as rising costs across the board make every Aussie’s head spin these days, that can’t be a bad thing, right?
But there’s a catch: You only benefit if you’re actually using power during that window. That’s why it helps to understand who 3 hours of free power actually works for before changing plans or upgrading appliances.
For example, most households:
Run their dishwasher in the evening
Do laundry on weekends
And generally use electricity whenever it’s convenient – not when it’s cheapest.
It’s a habit thing, and it’s hard to change across the board.
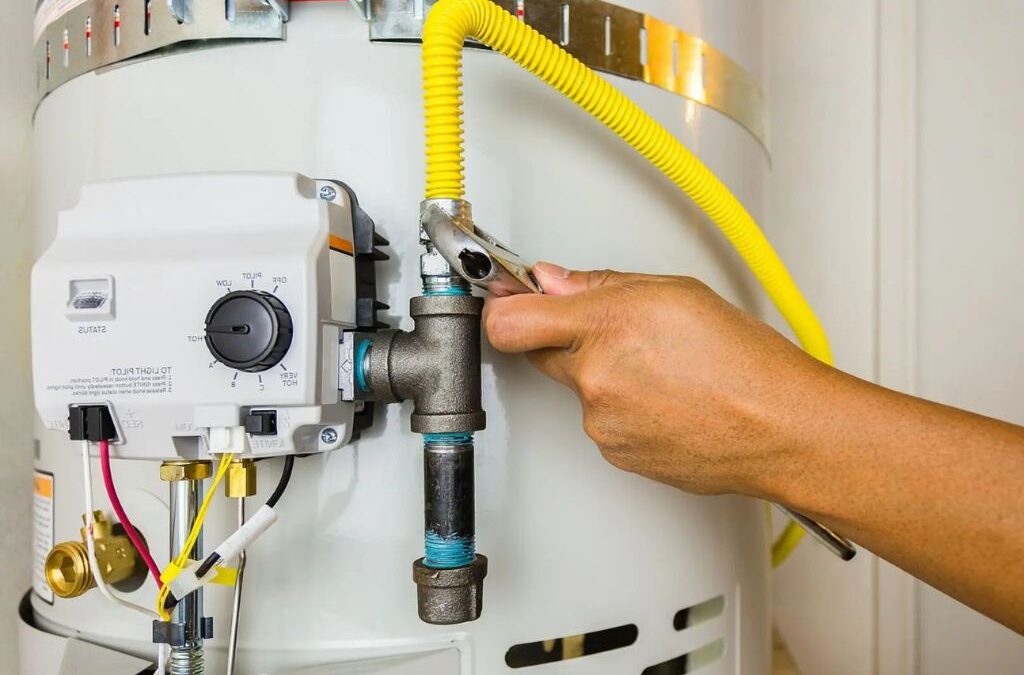
But your hot water system is different. It’s one of the biggest power users in your home, and it doesn’t care when it runs. With the right setup, you can shift that load entirely into the free window – and that’s where a new system starts to make real sense.
How, exactly?:
1. Newer systems can be set up to run at the right time
Older hot water systems are often locked into overnight off-peak schedules, fixed wiring – or have no meaningful timer control at all. They heat when they’re told to heat, in other words – and changing that isn’t always straightforward.
A newer system gives you that flexibility. It can be configured to run during the middle of the day – directly inside the 3 free hours of power window – so you’re getting that energy at no cost instead of paying standard rates overnight.
Everything else on this list builds from that foundation.
2. Better insulation means the heat you store actually lasts
Heating water at noon is only useful if it’s still hot at seven in the evening when someone wants a shower.
This is where a lot of older systems quietly fail. Poor insulation means heat bleeds out over the course of the day, which triggers reheating cycles later – often right when you’re cooking dinner, and the free window is long gone.
Modern systems are built to hold heat for much longer. That means the energy you captured for free in the middle of the day actually makes it to the point of use, rather than dissipating through the walls of an ageing tank.
3. A properly sized system means you’re not reheating during paid periods
Even with good insulation, an undersized tank is a problem.
If your system can’t store enough hot water to cover your household’s evening demand, it’ll top up when it needs to – not when it’s cheap. For a busy household, that can mean multiple reheating cycles running outside the 3 hours of free power Australia-wide window, quietly eating into any savings you thought you were making.
Upgrading to a properly sized system means one solid midday heating cycle can carry you through.
In a nutshell:
Less reheating
Less exposure to standard rates
More of the free power actually doing useful work.
4. Modern systems play nicely with timers and smart controls
Getting the timing right – consistently – is what separates actually saving money from theoretically saving money.
With older systems, adding timer control can be awkward – sometimes it’s possible, but sometimes it’s just not worth the effort. Newer systems are generally built with this in mind.
They’re easier to pair with:
Timers
Smart relays
Broader home energy setups.
And that means you can ‘set and forget’ rather than hoping the system behaves the way you want it to.
But it’s worth being clear here: a new system alone doesn’t automatically put you inside the free window. The setup still matters. But a newer system makes that setup significantly easier to get right – and to keep right.
5. Heat pump systems turn free power into something even more valuable
Unlike traditional electric storage systems that generate heat directly, heat pumps extract it from the surrounding air. They use a fraction of the electricity to produce the same amount of hot water – typically around a third, depending on conditions.
Now apply that to 3 hours of free power. You’re not just using free electricity – you’re using it in a system that stretches it significantly further:
More hot water stored per kilowatt hour
Less risk of needing to reheat later
A setup that’s genuinely aligned with the direction energy pricing is heading.
For households that are thinking long-term, it’s one of the strongest upgrade options available right now.
So … Do you actually need a new system?
Not necessarily … but maybe!:
If your current system is in decent shape and can be controlled effectively, there’s a real chance it can still take advantage of free 3 hours of power with some relatively simple adjustments to timing and scheduling.
But if your system runs at fixed times you can’t change, struggles to hold heat, or is getting close to the end of its life, an upgrade isn’t just about efficiency – it’s about being able to use the savings that are actually on the table.
Static Plumbing works with homeowners across Brisbane and the Sunshine Coast to get hot water systems working harder and costing less. Whether that means a smart adjustment or a full replacement, the team can give you honest advice and upfront pricing.
Get in touch today to find out what’s possible for your setup and home.
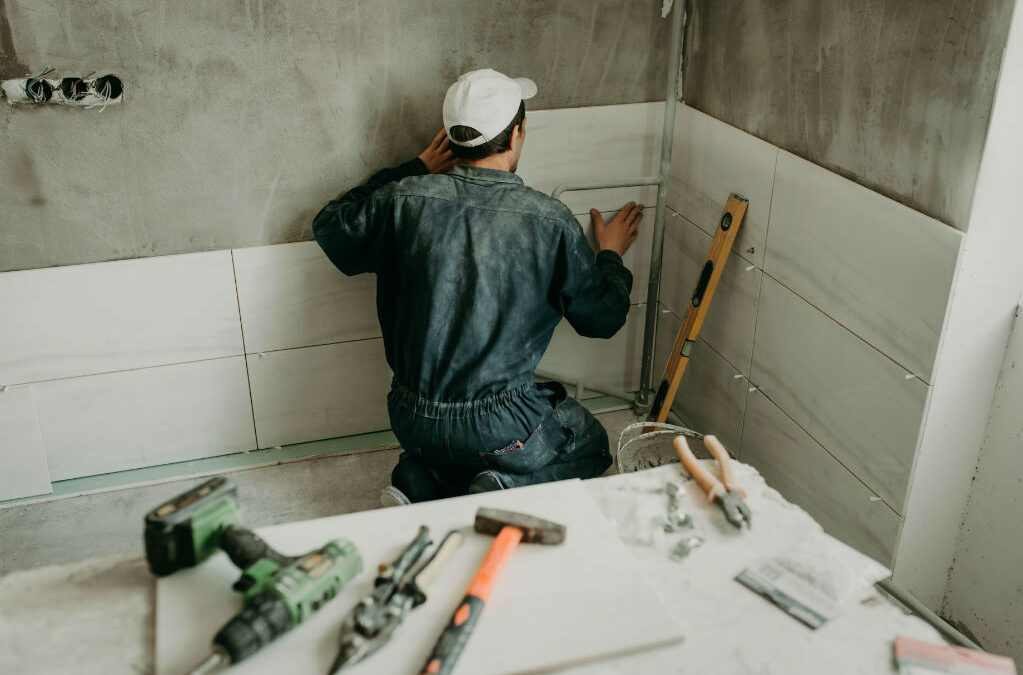
So you’ve just finished your bathroom renovation – congrats! New tiles, new fixtures, maybe a gorgeous freestanding bath you’ve been dreaming about for years. Hopefully, it looks amazing. But there’s one thing your plumber should have taken care of before packing up the van – and it’s something most homeowners have never even heard of: the QBCC Form 4.
If you’re planning or have recently completed a bathroom renovation Sunshine Coast wide or anywhere else in Queensland, this one’s worth understanding. It’s not too complicated, but it matters more than you might think.
So, what exactly is a QBCC Form 4?
In plain English, a Form 4 is an official notice that your licensed plumber lodges with the Queensland Building and Construction Commission (QBCC) to confirm that notifiable plumbing work has been carried out at your property. It records:
Who did the work
What was done
Where was it done.
Most bathroom renovation plumbing – think moving a toilet, relocating a shower, installing a new basin, or altering drain lines – falls under what’s called notifiable work. Unlike new builds, notifiable work doesn’t require local government permits or inspections upfront. Instead, your plumber simply has to lodge the Form 4 within 10 business days of completing the job.
Simple enough, right? But here’s why it actually matters for you as a homeowner:
6 Reasons your QLD bathroom reno needs a QBCC Form 4
Your bathroom reno might be done – but legally, it’s not finished until this form is filed.
But why’s that?:
1. It’s a legal requirement
Let’s start with the most straightforward reason: it’s the law.
Under the Plumbing and Drainage Act 2018, notifiable work must be registered with the QBCC. That responsibility sits with your licensed plumber – not you – but as the property owner, you’re also legally required to take reasonable steps to ensure the plumbing on your property complies with the rules.
If the Form 4 doesn’t get lodged, someone isn’t doing their job properly.
2. It protects you when you sell
This is the one that catches people off guard all too often.
When you sell your home in Queensland, you’re expected to disclose information about work carried out on the property. Buyers and their solicitors are increasingly savvy – they can actually search the QBCC’s notifiable work register by address. No Form 4 on record for a renovated bathroom? That’s a red flag that can:
Delay settlement
Trigger renegotiations
Or – even worse – come back on you as a costly legal or financial dispute after the sale.
3. It proves the work was done by a licensed plumber
A Form 4 can only be lodged by a licensed plumbing contractor. So when one exists, it’s essentially proof that a qualified professional carried out your renovation plumbing – not a handyman, not a mate who “knows his way around pipes.”
For any QLD bathroom reno, this kind of paper trail is genuine peace of mind.
4. It creates an official record for your property
Think of the Form 4 as part of your home’s plumbing history – it logs exactly what work was done and when.
This way, if you ever have issues down the track – a leak, a drainage problem, a dispute – that record can be really invaluable. Your local council (LGA) also has access to Form 4 data to maintain accurate plumbing records for properties in their area.
5. Your work can be audited for compliance
Here’s something most people don’t realise – after a Form 4 is lodged, the QBCC or your local council may audit a certain percentage of notifiable work to check it meets Australian Standards.
Sound a little daunting? Perhaps, but it’s actually a good thing. It means there’s accountability built into the system, and that the work done in your home is held to a proper standard. No Form 4 means no audit trail – and no way to verify the work was done right. So it’s there to protect you, not to hurt or inconvenience you.
6. No Form 4 is a serious red flag about your tradie
If you’ve hired a plumber and they’re vague about the Form 4, haven’t mentioned it, or flat-out say it’s not needed for your job – pay very close attention. Because a licensed, professional plumber always knows their obligations.
Skipping the Form 4 might mean they’re cutting corners on compliance, or worse, aren’t properly licensed at all. Either way, it’s your property on the line.
What you should do
If you’re planning a Sunshine Coast bathroom renovation of any size, ask your plumber upfront: “Will you be lodging a Form 4 with the QBCC?” Any reputable plumber will say yes without any hesitation at all.
And if you’re not sure whether a Form 4 was lodged for previous work on your property, you can even search the QBCC’s notifiable work register at qbcc.qld.gov.au – just enter the property address.
And if you’re looking for a licensed plumber you can trust to handle the job and the paperwork? That’s exactly what we’re here for.
Need a licensed plumber for your bathroom reno?
Here at Static Plumbing, we’ve built our reputation on delivering every bathroom renovation Brisbane and Sunshine Coast homeowners deserve – quality workmanship, upfront pricing, and all the compliance taken care of. Every time.
Have you opened your power bill lately and wondered whether your hot water system using too much electricity is to blame? Costs are soaring across all aspects of life at the moment, but in Queensland homes, water heating can account for around a quarter of total electricity use – and that’s a big chunk. With energy prices rising more than just about anything else, we understand that it’s a major issue.
The good news? You probably don’t need to replace your system to see real savings. If you manage to optimise your hot water system in just the right ways – including the settings, how you use it, and some smart tariff choices – you can get a system that works smarter rather than harder.
These tariffs are cheaper per kilowatt-hour because supply is controlled by the network. Power is available for set minimum hours each day, but it can be switched off at varying times. And that’s perfectly fine for storage hot water systems in particular that heat and store water for later use.
Tariff 31 generally provides at least 8 hours of supply per day and is often suited to larger electric systems (around 250L or more).
Tariff 33 provides at least 16 hours per day and is commonly used for systems from around 125L upward, including heat pumps and some solar storage systems.
If your hot water system is currently on Tariff 11 (standard 24/7 supply), it may be costing you more than necessary.
Not sure how to connect to an economy tariff?:
Your system must be hardwired on a dedicated circuit
And you’ll need a licensed electrician to assess your setup and coordinate with your retailer.
If you’re serious about learning how to save power on your hot water system, this is often the first place we look.
2. Check your thermostat setting
Many homeowners never check if they can tweak their thermostat setting after installation.
In Queensland, the recommended storage temperature is 60 °C – the sweet-spot to to ensure bacteria control while avoiding unnecessary overheating.
If your thermostat is set any higher than that, you’re simply using more electricity than needed – because it needs to be delivered to your taps quite a bit lower to reduce the risk of scalding. But if it’s set too low, you risk hygiene issues.
A small tweak here can make a noticeable difference over time – so look into it.
3. Make sure your system is the right size
In simple terms:
An undersized system will constantly reheat because it runs out of stored hot water.
An oversized system can also be inefficient because you’re heating more water than you use.
If you’re looking to optimise hot water system performance, capacity matters.
For example:
1-2 people may suit a 125-160L system
3-4 people often require 250L+
Larger households may need 315L or more.
Economy tariffs also have minimum size recommendations, so hot water sizing and tariff selection often go hand in hand.
Unsure? A licensed plumber can easily assess your usage and recommend a better match.
4. Reduce heat loss
Even a perfectly-sized hot water system can waste energy if heat is escaping.
The question, then, is how to improve efficiency:
Insulate exposed hot water pipes
Check that your tank insulation is intact
Position the system close to main usage areas when possible.
Remember: The less heat that escapes, the less reheating is required.
5. Shorten shower time (it makes a big difference!)
It sounds basic, but it’s incredibly effective – and a minute here or two under the hot stuff isn’t going to make much of a difference to your life, is it?
What it will do, however, is save you a considerable amount of money. If you can swallow a reduction of shower time from eight minutes to four, we’re talking about hundreds of dollars here.
Prepared to go even further? Installing low-flow showerheads also reduces hot water usage without even sacrificing noticeable pressure.
If your hot water system using too much electricity is linked mainly to heavy usage, and behaviour changes are going to have to be part of the solution.
6. Fix leaks immediately
A dripping hot water tap might not seem like a big deal, but even a slow leak can waste thousands of litres per year.
Because that water has already been heated, every drop is costing you.
If you notice hot water leaks, have them repaired … straight away.
7. Consider upgrading if your system is old
Do you have an older electric storage systems? These ones in particular are a lot less efficient than the modern options – even if you want to stick with electricity and a familiar tank.
If your unit is approaching 10-15 years old, it may be worth considering:
Heat pumps and solar systems can reduce your running costs dramatically, especially when paired with the correct tariff.
An upgrade isn’t always necessary – but sometimes it’s the smartest long-term move. The best place to start is by asking your trusted hot water plumber.
8. Check if you’re already on an economy tariff
Do you have absolutely no idea what kind of tariff you’re currently on?
The easiest way to find out is by checking your electricity bill. If you see separate usage listed under Tariff 31 or Tariff 33 (or a similarly labelled controlled load tariff), you’re already connected.
If not, and your system qualifies, a licensed technician can assess whether switching makes sense.
Need some more hot water efficiency advice?
If you’re trying to work out how to save power on your hot water system, don’t just focus on a single factor. At the end of the day, it’s going to be a combination of:
Getting onto the right tariff
Tweaking those thermostat settings
Matching system size with your usage & home.
Modifying your behaviours.
For you, the solution might be really simple – while at other times it might mean a smart and timely system upgrade. The key is getting clear advice before making changes.
Here at Static Plumbing, we’re helping homeowners just like you across Brisbane and the Sunshine Coast all the time as they assess their hot water setup properly. From discussing economy tariff suitability to repairing a simple leak and beyond, we always focus on the practical, long-term savings that really are within your reach.
Is your hot water system using too much electricity? Not sure how to optimise your hot water system performance before your next power bill gives you a nasty surprise? Give Static Plumbing a call – and we’ll help you make informed decisions that actually reduce your costs.
You’re probably reading this because a plumber, a builder or even the council has mentioned a ‘legal point of discharge’ and you’re not quite sure what they’re talking about.
Honestly, there are plenty of other reasons why someone has told you that you need to know where water has to go.
What is a legal point of discharge?
Maybe you’ve seen the acronym, too: ‘LPOD’. What’s the LPOD meaning, then? You’re in the right place, because understanding all of this isn’t just about compliance – it’s about protecting your property, avoiding potential fines and preventing nasty neighbour disputes down the track.
Let’s get stuck in:
In Queensland, including Sunshine Coast and Brisbane areas, stormwater needs to be managed thoughtfully and legally so it doesn’t cause harm to other properties or local infrastructure. The legal point of discharge plays a big role in that.
Let’s walk through pretty much everything you could possibly need to know.
1. What is a legal point of discharge?
At its simplest, a legal point of discharge is the point on your property where stormwater runoff is lawfully allowed to be discharged into the local stormwater system.
An inter-allotment drainage system that connects to a council drain.
The term lawful point of discharge comes up in local planning, building and drainage regulations because councils need to ensure stormwater is managed in a way that doesn’t cause flooding or damage to neighbouring land.
Think of it like this: the rainwater that hits your roof, driveway and other hard surfaces, and it needs somewhere to go. It can’t just run wherever it likes – there’s a designated outlet that’s been established by your local council or identified through planning documents.
That’s the legal point of discharge.
2. Why it matters for your property
You might still be wondering why lawful points of discharge are so important. Here’s the key: Queensland councils require that stormwater from your property be directed to an approved discharge point to manage both safety and community infrastructure efficiently.
If stormwater is not correctly directed:
It can pool around your house, causing damp or structural issues.
It can flow onto neighbouring land, leading to disputes or legal trouble.
It can overload or pollute council drainage infrastructure.
You could be fined or required to fix the problem if you’re building or renovating.
For houses built after the mid-1970s in Queensland, connecting roof water and stormwater systems to a legal point of discharge such as a kerb and channel or council drainage system is typically required.
3. How to find your legal point of discharge
How to find legal point of discharge locations on your properties isn’t always as simple as just looking at the driveway and guessing.
The location depends on:
Your block’s topography (how the land slopes)
Where your stormwater infrastructure is installed
The nearest council stormwater connection
Local planning and building regulations.
Not sure how to find it? You can:
Check Council Plans: Many councils, like Brisbane City Council or Sunshine Coast Council, maintain mapping or documentation that shows where stormwater drains and legal discharge points are located. Contact the council’s infrastructure or planning department and ask for LPOD information for your address.
Speak To A Building Certifier: A certified building certifier can help interpret local planning and drainage rules, including identifying the lawful point of discharge relevant to your property.
Ask A Licensed Plumber Or Drainage Specialist:Qualified plumbers or drainage professionals who regularly work with stormwater systems can assess your site, follow runs of pipework and point you toward where stormwater must be directed.
Title & Easement Searches: In some cases, stormwater easements registered on your title will indicate where a drainage line must flow. These are legal agreements that allow council or authorities to maintain drainage infrastructure.
4. Legal points of discharge and Queensland regulations
In Queensland, stormwater discharge rules aren’t found in a single law – instead, they’re managed through a combination of:
Local Council planning and drainage requirements:
The Queensland Urban Drainage Manual (QUDM), which guides engineers and councils on best practice for how stormwater should be managed – including the lawful point of discharge ‘test’ that councils refer to for development assessments
Building regulations covering how stormwater systems must be connected in new builds or redevelopments:
What’s important to understand is that Queensland doesn’t have a single statute that spells out exactly how stormwater must be discharged, but individual councils use the lawful point of discharge concept through their planning schemes and building assessments to ensure stormwater is managed properly.
5. What is a stormwater connection point?
You also might hear the phrase ‘stormwater connection point’ used alongside LPOD. This refers to the physical location where your private stormwater pipes connect with the public or council stormwater network.
It might be:
A council drain under the street
An inter-allotment drainage pipe
A kerb adaptor that connects to underground infrastructure.
Up to that connection, stormwater infrastructure – including pipes and pits – is usually your responsibility to install and maintain. After that point, the responsibility typically shifts to council.
6. What happens if you don’t comply?
Directing stormwater to a point outside of your lawful discharge point, or altering it in a way that increases flow onto neighbouring land without consent, can lead to:
Council enforcement action
Requirement to remediate your drainage setup
Fines under planning or environmental laws
Neighbour disputes or civil nuisance claims.
If you think it’s all about bureaucracy, it’s not just that – it’s really just practical. Water always flows downhill, and poorly managed runoff really can damage people’s gardens, property foundations, and council infrastructure.
If you’re unsure whether your current setup meets all the legal requirements, it’s worth checking with council or a qualified plumber before you start any work like building or landscaping.
7. Tips for managing stormwater the right way
Wondering if there are any practical things residents and property owners like yourself can (and should) do?:
Keep gutters, downpipes and stormwater pipes clear and well-maintained, especially before heavy rain.
Make sure your stormwater is directed towards the street or council drain where possible – or to an engineered inter-allotment system.
Avoid redirecting runoff onto neighbours’ property – this can create civil liability issues.
When planning renovations or extensions, consult a certifier or plumber about your lawful point of discharge first.
If your block slopes away from the street, you might need specialised drainage design to meet legal discharge requirements.
Need help understanding your legal point of discharge?
Stormwater and drainage issues like can feel technical and confusing, can’t they? That’s especially the case when complex council rules are in play. From roof water connections and driveway runoff to complex site works, knowing your legal point of discharge QLD wide – whether on the Sunshine Coast or in Brisbane or beyond – makes your life easier and keeps you compliant.
If you’re planning work on your property, unsure where your lawful discharge point is, or think your current setup isn’t doing the right thing by stormwater runoff, you can always get in touch with the team at Static Plumbing. Our friendly, licensed plumbers can assess your drainage layout and help you plan compliant, effective stormwater connections with confidence.
Contact us today to talk about your drainage and stormwater questions – we’re here to help.
Tree roots and plumbing really don’t mix – at all. And here in beautiful Queensland, where everything seems to grow fast and wide, some species are far more likely than others to cause serious underground damage. If you’ve been searching for the worst trees for sewer lines, it’s probably because you’ve had repeated blockages or slow drains – or been warned that roots may have already found their way into your pipes. The reality is that certain trees are simply far more aggressive around water and nutrients – like your precious plumbing pipes! And knowing which ones to avoid can save you a lot of stress (and money) later. In South East Queensland, tree root blockages are incredibly common. Urban Utilities recently reported thousands of wastewater blockages caused by roots in a single year. The perfect storm here is:
Warm weather
Thirsty trees
Ageing pipework.
Put them all together, and once those roots creep into a tiny crack in a pipe, they simply won’t creep back out in politeness – they’ll grow, they’ll thicken, and they’ll unkindly trap debris until your plumbing flow stops completely. Let’s zoom in on the 5 species we most regularly see causing trouble across Brisbane and the Sunshine Coast – and what you can realistically do about them.
1. Camphor Laurel
Camphor Laurel trees are large, fast-growing, and extremely thirsty. Their root systems are aggressive and wide-spreading, often travelling well beyond the canopy.
If there’s a tiny crack or loose joint in your sewer or stormwater line, roots will surely find it. And once inside, they expand quickly and create a dense mass that blocks flow.
In many parts of Queensland, Camphor Laurel is considered an environmental weed. Brisbane City Council actively manages invasive species, and the Queensland DPI provides guidance around weed control laws.
WHAT TO DO:
If you already have one near your sewer line, don’t ignore early warning signs like slow drains or gurgling toilets. Root cutting and CCTV drain camera inspection may be needed. If planting new trees, try to avoid this species entirely.
2. Fig trees (Ficus)
When people ask us about the worst trees for sewer lines, figs almost always top the list.
Ficus species are well known for their powerful, invasive root systems. Urban Utilities specifically warns against planting figs near wastewater pipes because roots actively seek out water and nutrients. They can travel two to three times the radius of the canopy.
We’ve seen even otherwise healthy pipes become pressured and displaced over time.
WHAT TO DO:
Never plant a fig near underground services. Before planting, you can request a free underground services plan through Before You Dig Australia or check drainage plans with your local council to see exactly where pipes run on your property. If one already exists close to your home, consider a plumbing inspection to assess risk. Removing a mature fig can be complex and may require council approval.
3. Jacaranda
Jacarandas are beautiful, and when they’re in bloom, they’re iconic. But beneath the surface, their roots are opportunistic and persistent.
They’re not quite as aggressive as figs, but they’re still capable of causing serious blockages – especially in older clay or concrete pipes.
We often see Jacaranda roots entering at pipe joins and growing inside the line, acting like a net that catches wipes, tissues and debris.
WHAT TO DO:
If you’re keeping a Jacaranda, ensure your stormwater and sewer pipes are in good condition. Preventative inspections can save you thousands.
4. Eucalyptus (Gum trees)
Eucalyptus trees are a Queensland staple. But many gum varieties have extensive root systems that travel far in search of moisture.
Large gums near properties so often contribute to stormwater and sewer line blockage and damage – particularly where older pipework is present.
Their size alone makes them risky close to buildings.
WHAT TO DO:
If you’re planting, ensure there’s a significant distance from all underground services. As we’ve said, if you’re unsure where your pipes run, request a drainage plan from council or lodge a query through Before You Dig Australia before planting.
5. Cocos Palms
Cocos Palms are common in coastal areas across the Sunshine Coast and Brisbane. While their root systems aren’t as wide as figs, they can still infiltrate damaged or ageing pipes.
Because they’re often planted close to homes and boundaries, it’s that proximity that becomes the issue rather than root aggression alone.
WHAT TO DO:
Avoid planting directly above or adjacent to known pipe routes. If removing palms, check whether the species is considered invasive in your local council area.
Why roots target pipes
Tree roots don’t really ‘attack’ pipes – they’re just following the moisture and the nutrients, and your pipes (and the wastewater) are happy to oblige!
Tiny feeder roots easily slip through the smallest of cracks. And once inside, they start to grow and swell and form a dense mass. We plumbers often refer to it as a drain tree – when a tree’s root system has effectively established itself inside your pipe. From there, the debris builds up and your blockage nightmare begins.
Warning signs you may already have a problem
If roots have already made their way into your pipes, your plumbing will usually start giving you subtle – and sometimes not-so-subtle – warning signs. Keep a close eye (ear and nose) out for:
Noticing these already? Don’t wait a second longer, because root damage is not going to fix itself.
What to do if roots are already in your pipes
If roots have taken hold inside your pipes, acting quickly is the best way to prevent further damage and avoid a much more expensive repair down the track.
You can:
Book a CCTV drain inspection: This confirms whether roots are present and shows how severe the intrusion is.
Mechanical root cutting:High-pressure jetting or root cutting equipment clears the obstruction.
Assess pipe condition: If cracks remain, roots will return. Pipe relining is often recommended to permanently seal entry points without excavation.
Consider long-term planting decisions: If the offending tree remains, the issue can recur.
Planting smarter: The best trees for sewer lines
We’ve covered the worst, now let’s look on the bright side! Because if you’re landscaping or rebuilding, choosing the best trees for sewer lines is one of the smartest things you can do.
Urban Utilities recommends avoiding species that aggressively seek water, like figs and paperbarks, and opting for less invasive varieties. Smaller shrubs are generally safer on compact blocks.
Brisbane City Council also encourages residents to select native or non-invasive plants and to check vegetation regulations before removal or planting.
And when in doubt, speak with your local nursery – and always confirm pipe locations before digging.
Roots already affecting your pipes?
So don’t forget – Queensland’s climate encourages strong growth above and below ground. And the wrong tree in the wrong place can cost you thousands in plumbing repairs.
If you suspect roots are already affecting your pipes, or you’d like a preventative inspection for peace of mind, Static Plumbing can definitely help. Our friendly, licensed team across Brisbane and the Sunshine Coast uses CCTV drain inspection cameras and high-pressure water jetting equipment to identify and clear root blockages properly – not just temporarily.
Contact the plumbers at Static Plumbing today to protect your pipes before a small tree root becomes a major headache.
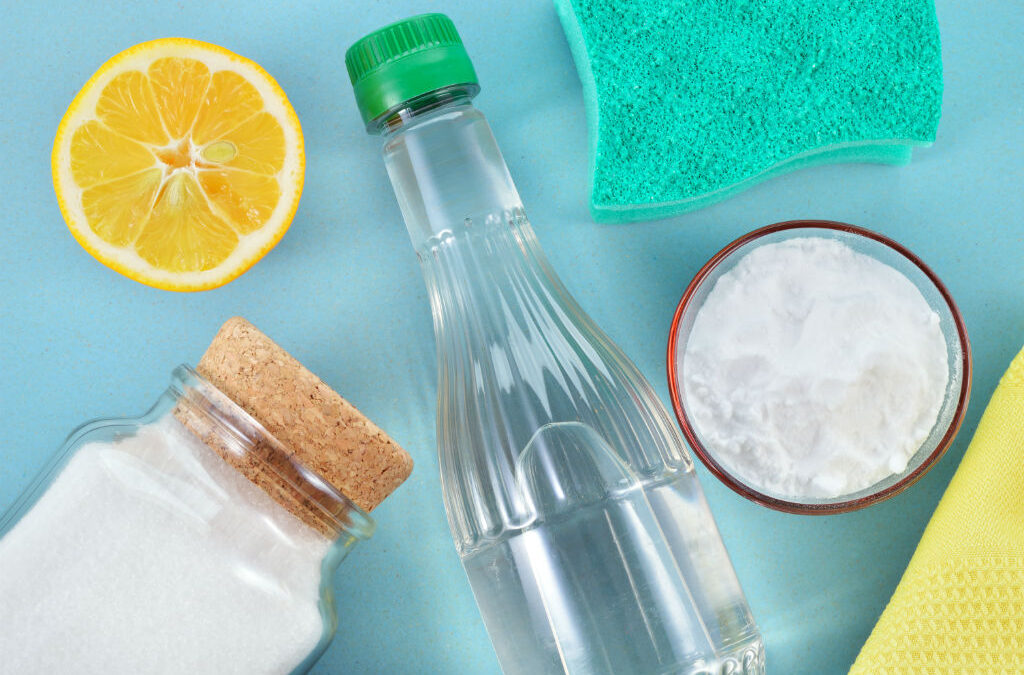
There’s a reason more and more Australians are searching for a natural drain cleaner lately. Between rising grocery bills, tradie shortages, and the general cost-of-living squeeze, people are understandably looking for ways to fix small household issues themselves before reaching for harsh chemicals or their wallet.
And when it comes to slow sinks or mildly blocked drains, it’s tempting to try something simple, safe … and already sitting in the pantry.
The good news? Some homemade options genuinely work – at least for minor build-ups. The key is knowing what’s realistic and what’s not. A full-blown tree root invasion isn’t going to dissolve because you poured vinegar down the pipe. But a bit of soap scum, grease, or hair? That’s a different story.
Before we get to the one we think you really need, let’s look at two solid runner-ups:
1. Salt & hot water flush (The simple maintenance fix)
This one is more preventative than powerful, but it’s surprisingly effective if your sink is just starting to slow down.
What you’ll need:
Half a cup of table salt
A full kettle of boiling water
How to do it:
Pour the salt directly down the drain.
Slowly follow it with the boiling water.
Leave it for 10-15 minutes before running hot tap water to flush it through.
The salt helps to scour the inside of the pipe slightly, while it’s the boiling water that softens and shifts the grease build-up. It’s not a miracle cure, but it’s a handy drain cleaner natural method for kitchen sinks where fats and oils are the main culprit.
2. Baking soda & lemon (The freshen-up option)
If you’re dealing with foul odour rather than a full-on blockage, this is a gentle option worth trying.
Many people searching for a natural drain cleaner baking soda solution are really just trying to freshen things up without pouring chemicals into their plumbing.
What you’ll need:
Half a cup of baking soda
Half a cup fresh lemon juice (or bottled if that’s what you’ve got)
Hot water.
How to do it:
Pour baking soda down the drain.
Add lemon juice slowly – it will fizz!
Let it sit for 20-30 minutes.
Flush with hot water.
The fizzing reaction helps to loosen any light debris, and the lemon cuts the odours naturally. It’s not going to clear a serious blocked drain, but it’s actually pretty great for maintenance and keeping things smelling fresh.
3. The only homemade drain cleaner you need to know!
If you’ve only got time to try just one method, this one’s it.
When people ask what is the best natural drain cleaner, this classic baking soda and vinegar combination is usually what they mean – and for mild blockages, it genuinely can work a lot more often than you’d imagine.
Some even refer to it as a natural drain cleaner hair dissolver, and while it won’t exactly ‘dissolve’ thick hair clumps like commercial caustic products claim to, it really can help break down the soap residue that binds the hair together.
The proper way to do it (Step-by-step)
You’ll need:
1 cup baking soda
1 cup white vinegar
A kettle of boiling water
A drain plug or cloth.
How to make natural drain cleaner and use it correctly:
Pour the full cup of baking soda down the drain.
Follow immediately with the white vinegar.
Quickly cover the drain with a plug or cloth to keep the fizzing reaction working downward instead of bubbling back up.
Leave it alone for at least 30-60 minutes (longer is fine).
Finish by flushing thoroughly with boiling water.
The chemical reaction between the baking soda (alkaline) and the vinegar (acidic) creates powerful carbon dioxide bubbles. Those bubbles help dislodge the light grime and soap build-up that’s clinging to your pipe walls.
If you’re searching online for a reliable natural drain cleaner recipe, this is the one most plumbers agree is safe to try before turning to a pro.
A quick reality check
What is a natural drain cleaner actually capable of doing? That’s important to quickly run through – to keep your expectations fully in check.
If you’ve tried one of these and the water still won’t move – or worse, it’s already backing up – that’s when it stops being a DIY situation at all.
When to call a plumber
If your sinks are gurgling, multiple fixtures are draining slowly, or water is pooling outside near your sewer line, you’re likely dealing with something just a tad more serious than your humble pantry ingredients can handle.
That’s the difference between just loosening debris and properly clearing the root cause.
Need help with stubborn blockages?
There’s absolutely nothing wrong with trying a safe, homemade solution first – especially in today’s economic climate. These methods are affordable, environmentally friendly, and far gentler on your plumbing than harsh chemical cleaners.
Just remember: if the problem persists, it’s not because you did it wrong. It’s because the issue is deeper than surface build-up.
So if you’ve tried a natural approach and the drain is still playing up, the team at Static Plumbing can help. Our licensed plumbers service Brisbane and the Sunshine Coast with advanced drain clearing, CCTV inspections, and long-term solutions – not just temporary fixes.
The odd drip-drip-drip from a leaking shower head is one of those household problems that’s easy to shuffle down the priority list at first. But eventually, the drip becomes constant, your water bill starts creeping up, or the sound drives you absolutely mad when you’re trying to sleep at night. If you’ve noticed your shower head leaking, you’re definitely not alone – it’s one of the most common plumbing complaints we hear, bar none.
The good news? Sometimes the cause is extremely simple. The bad news? Sometimes it’s not – and DIY attempts can make things worse if you’re not careful.
Before we show you how to fix a leaking shower head, let’s quickly check whether you’re dealing with a basic issue you can safely handle yourself.
Does this sound like your problem?:
Leaking shower head when water is off?
Slow, steady leak – not a spray?
Leaking only from the shower head, not the wall?
No water damage or pressure changes?
If yes, you can safely keep reading. If not, skip ahead to the section about when to stop and call a plumber!
This guide is for one simple problem only
First, a warning: This guide is really only designed for the most common and simplest cause of a leaking shower head:
Namely: A worn or damaged internal washer or seal inside the shower head or tap assembly.
Washers and seals inevitably wear out over time due to water pressure, heat, mineral buildup – or simple age and wear and tear. When they fail, water continues to seep through even when the tap is fully off.
… Then this DIY fix will not solve the issue – and forcing it may create a bigger problem.
How to fix a leaking shower head (Step by step)
Even though this is considered a ‘simple’ fix, it still requires care, patience, and attention to detail. Rushing is how threads get stripped and fittings crack.
And in case you’re wondering whether you’re even allowed to change a shower head without a plumbing license, the answer is YES – as long as you’re not altering any fixed plumbing or pipework behind the wall. Once you start touching:
Tap bodies
Valves
Cartridges
Or internal pipework …
… That work needs to be done by a friendly licensed plumber.
With that said, let’s get that shower head fixed!:
Step 1: Turn off the water properly
Shower leaking from shower head? With a bit of luck, it’s just the washer.
Before touching anything, isolate the water supply. This may be at the bathroom isolation valves or the main water shut-off for the house. Turn on the shower briefly to confirm the water is fully off.
And be warned: Skipping this step is how bathrooms get flooded.
Step 2: Protect the fittings
Place a cloth or towel over the shower head and tap fittings. This prevents scratches when using tools and helps protect chrome finishes.
Even small cosmetic damage often turns what should be a ‘quick fix’ into a regret.
Step 3: Remove the shower head carefully
Using an adjustable spanner or wrench, gently loosen the shower head by turning it anticlockwise. Do not force it. If it won’t budge easily, stop – excessive pressure can crack the fitting inside the wall.
Once loose, unscrew it by hand.
Step 4: Inspect the washer and seals
Inside the shower head connection or tap assembly, you’ll find a small rubber washer or seal. Look for:
Flattening
Cracks
Brittleness
Deformation.
Even really minor wear can cause a significant leak.
Step 5: Replace the washer
Take the old washer with you to a plumbing supply or hardware store to ensure you get an exact match. Washer sizes really matter – and close enough is never good enough.
Install the new washer carefully, making sure it sits flat and evenly.
Step 6: Clean the threads
Before reassembling, clean the threads on both the shower arm and shower head. Remove:
The old thread tape
All debris
All the mineral buildup.
Wrap fresh plumber’s tape clockwise around the threads (2-3 wraps is enough).
Step 7: Reinstall the shower head
Screw the shower head back on by hand first. Only use tools for a final gentle tighten – because overtightening is a common DIY mistake that causes cracks and leaks later.
Step 8: Turn the water back on slowly
Restore the water supply, and test your newly-fixed shower. Watch closely for drips both both while it’s running and after turning it off again.
If the leak is gone – great! If not, stop right here.
When DIY stops being a good idea
Discovering a shower head leaking can look like a simple enough problem – but it so often hides a more serious issue. We regularly attend jobs where a small drip turned into:
Stripped threads inside the wall
Cracked fittings
Damaged tap cartridges
Leaks behind tiles
Water damage that went unnoticed.
So – If the leak continues after replacing the washer with our super-simple fix, or if you notice:
Water leaking from the wall
Inconsistent pressure
Leaking when taps are fully off
Multiple fixtures affected …
… Then we’re sorry to say it, but the simple problem is no longer so ‘simple’. Understanding how to stop a shower head from leaking with this guide may be helpful for the future, but you’re going to have to read on.
What plumbers often find instead
All too often, when homeowners call us about a leaking shower head and suspect it may just need a new washer, the real cause is sometimes:
A worn tap cartridge (not a washer)
Excessive water pressure damaging seals
Internal pipework issues
Poor installation from a previous repair
Mineral buildup affecting valves.
And these issues always require proper diagnosis and professional tools – not to mention a licensed plumber – to fix them safely and permanently.
Not sure? That’s the right time to call a plumber
Trying to save money by learning how to fix leaking shower head issues with DIY is understandable, especially these days – but water damage is expensive, and plumbing mistakes compound extremely quickly.
If your quick shower leak fix didn’t work, or if you’re unsure at any point, it’s best to stop before things escalate. Static Plumbing can quickly identify whether your leak is a simple repair or something deeper – and fix it properly the first time.
If your shower head is still leaking – or you’d rather not risk it – get in touch today for clear advice and professional help.
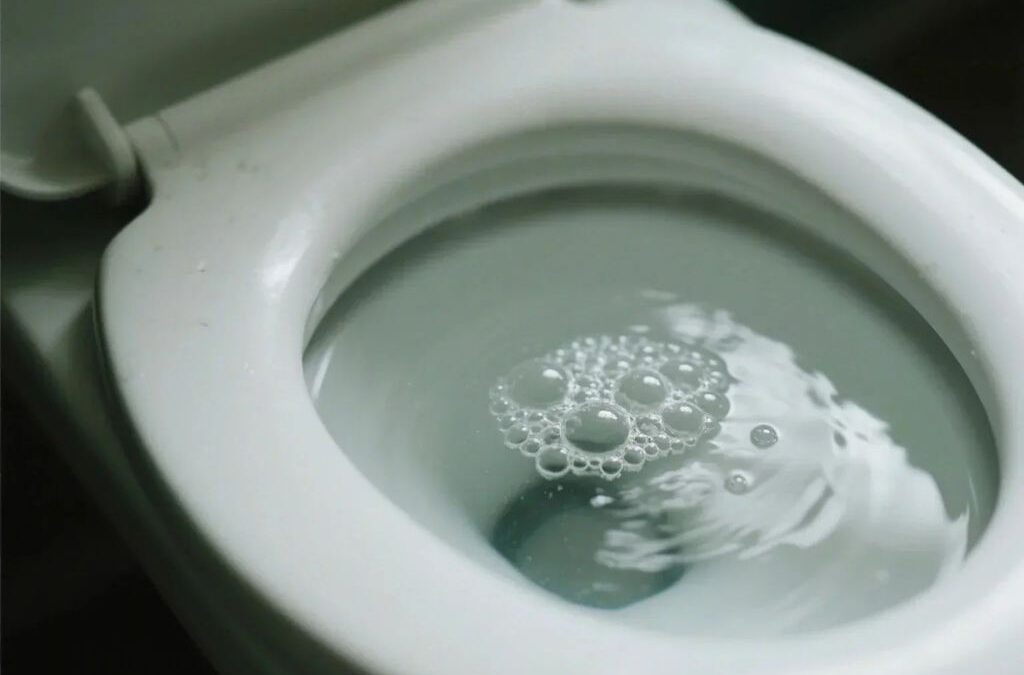
You probably know the scene very well. You’re sitting there, scrolling your phone, minding your own business … then you hear it. A quiet blub-pop-blub-pop from the bowl. You look down and – quite reasonably – say out loud: Why is my toilet bubbling – and, more importantly, why now?
It might seem harmless (or just awkwardly funny), but a bubbling toilet is one of those apparently minor plumbing signs that deserves serious attention. Sure, sometimes it’s minor. But at other times, it’s your plumbing system politely warning you that something bigger is brewing below the surface.
We break down every common reason we’ve spotted when a toilet bubbles or gurgles, including:
What it usually means
And when it’s time to stop ignoring it.
The top reasons a toilet starts bubbling or gurgling
As strange as it sounds, a bubbling toilet is almost always reacting to something happening further down the pipes.
1. A partial blockage in the drain line
This is by far the most common cause. When wastewater can’t flow freely through the drain, air gets trapped and pushed back up – often escaping through the toilet bowl as bubbles.
At this stage, the toilet may still flush normally, which is why people often ignore it. Unfortunately, bubbling is often the early warning before a full blockage develops.
2. A blocked or restricted vent pipe
Your plumbing system relies on vent pipes (usually running through the roof) to balance air pressure. But a vent can become blocked by:
Leaves
Debris
Birds nests
Even heavy rain – common in our region.
When any of that happens, air can’t escape properly. Instead, it gets forced back through the nearest fixture – frequently the toilet. This is a classic cause of toilet gurgling, even when water seems to be draining fine.
3. Sewer line issues further down the system
Sometimes, the problem isn’t in your bathroom at all. All of these can disrupt airflow and drainage:
In these cases, the bubbling may be subtle at first, then worsen over time. Left unchecked, it can escalate into slow drains, sewage smells, or backups.
4. Shared drains reacting to other fixtures
Ever wondered ‘why is my toilet bubbling when the shower is running’? Reason # 4 is usually why.
When water from the shower rushes through a restricted drain, it displaces air – and that air escapes through the toilet. It’s a strong sign of a developing blockage somewhere in the shared drain line.
5. Poor plumbing design or older installations
In older homes – and there are plenty of those across Brisbane and the Sunshine Coast – plumbing systems weren’t always designed to modern standards. So, inadequate venting or poorly graded pipes can make bubbling a regular occurrence.
You might hear bubbling:
After flushing
After using the sink
Seemingly at random.
You’ll then find yourself asking why is my toilet making bubbling noises when nothing else is happening.
6. Early signs of a blocked drain elsewhere
A bubbling toilet doesn’t always mean the toilet is the problem. It can actually be reacting to a blocked drain forming in another part of the system, such as the laundry or kitchen drain.
This is why plumbers treat bubbling as a system-wide symptom, not just a single fixture issue.
7. Yes … Even that awkward thought you had
Let’s address it right now with no embarrassment:
Why is my poop bubbling in the toilet?
But as funny (or alarming) as it sounds, the bubbling isn’t caused by what’s in the bowl – it’s caused by trapped air moving through water due to pressure imbalance or restriction in the pipes.
The toilet is just the messenger. And, unfortunately, it’s rarely lying.
Why bubbling toilets shouldn’t be ignored
A gurgling toilet might not seem too urgent, but it’s often the first sign of a problem that will get much worse. What starts as occasional bubbling can turn into:
Slow drainage
Unpleasant smells
A full sewer backup.
And all of those are far more expensive to deal with. So, catching the issue early usually means a simpler, faster fix.
Need a plumber to check it properly?
If your toilet keeps bubbling or making gurgling noises, the friendly team right here at Static Plumbing can help. We use professional drain inspection and clearing equipment to find the real cause – and fix it before it turns into a bigger problem.
When a drain inside the home blocks, you usually notice it straight away – a slow sink, a backed-up shower, or a toilet that won’t flush properly. The solutions can be pretty simple too. But an outside drain is different – and knowing how to unblock drains outside is more complicated still.
With outside drains, problems tend to build quietly over weeks or even months (or years!), and by the time you realise the outside drain is blocked, the issue is usually far more stubborn.
Indoor plumbing blockages tend to involve soap, fats, hair and everyday household waste. Outdoor blockages are a different beast entirely. For a stubbornly blocked drain outside house walls, we’re talking about things like:
Mud
Stormwater debris
Roots
Silt
Collapsed pipework
Years of built-up sludge.
All of it can choke a drain line in a really serious way. That’s why unblocking drains outside often needs a different approach – and why the fixes that work indoors don’t always work outdoors.
Still, there are simple steps you can safely try before calling in a professional. These won’t replace proper drain clearing, but they might help restore some flow – or buy you time until a plumber arrives!
Drain blocked and want to have a go yourself? We’ve put together a practical, homeowner-friendly guide on how to unblock outside drains using safe, low-skill methods – and we’ll then take a look at how the professionals handle the tougher jobs.
Why outside drains block so easily
Outdoor drains take everything the weather throws at them – especially here on the Sunshine Coast & Brisbane:
Soil washes in after storms.
Leaves gather in pits and grates.
Driveways shed sand and gravel.
And underground, tree roots are constantly searching for moisture – pushing into even the smallest gaps in your pipes. It doesn’t take long before a blocked drain outside the house becomes noticeable.
Outside drains also fall into two main categories – stormwater and sewer. Stormwater pipes carry rainwater and debris from gutters, yards and driveways, while sewer lines carry wastewater from toilets, basins and showers. And the process of unblocking a toilet drain pipe outside is very different from clearing a stormwater pit full of silt. Knowing which system is blocked helps you choose the right solution.
How to unblock an outside drain – 5 Steps you can try
We’ve made sure all of these methods are:
Safe
Legal
Require minimal tools to unblock drains
And – crucially – won’t damage the system.
Think of them as early troubleshooting steps. If the blockage is significant – or caused by roots or collapsed pipework – these methods may help temporarily, but a permanent solution will need a plumber’s drain cleaning tools and expertise.
1. Clear the surface debris around the drain opening
Leaves, mud and garden waste often stack up around the grate and act like a plug, stopping water from entering the system.
Remove the grate if possible
Scoop away anything that’s sitting on top of or directly inside the opening.
You may be surprised how often this simple step in your journey towards learning how to unblock outside drain problems improves flow – at least a little. It also helps you see whether water is sitting in the pipe or draining slowly.
2. Flush the drain with hot water or a garden hose
This is one of the easiest ways to loosen sludge or dirt inside the first section of the pipe. Hot water helps break down greasy residue, while steady pressure from a hose can push through lighter blockages.
Start gently to avoid forcing the blockage deeper.
If the drain backs up straight away, stop.
It’s important to stop if the drain backs up at that point, because it means the obstruction is further down the line and needs stronger tools.
3. Use a simple drain snake or long flexible rod
For blockages within reach, a basic snake can help. These are inexpensive and available at most hardware stores. They work best for debris, compacted leaves, or soft obstructions.
Insert the snake carefully
Rotate it to help break the blockage apart.
This won’t clear tree roots or structural problems, but for lighter issues, it can restore enough flow to keep things manageable.
4. Try a plunge-style method for small outdoor drains
Did you know learning how to unblock a drain pipe outside can be pretty similar to indoor drains – especially when it comes to plungers? Many people associate plungers with indoor plumbing, but they can help with shallow outdoor drains too. A plunger works by creating movement inside the pipe, which can dislodge compacted material near the opening.
Use slow, steady pressure rather than hard thrusts.
If the drain begins to bubble or gurgle, the blockage is shifting – and that’s a good sign.
5. Pour a bucket of water from height to create force
This is a simple trick often used before calling a plumber.
Fill a large bucket
Pour it quickly from waist height.
That creates a short burst of pressure that can move soft blockages. It doesn’t replace proper tools, but it can break the surface tension of silt or loosen debris enough for the drain to start moving again. If the water rises back up instantly, the obstruction is more severe and deeper in the line.
When DIY stops working
Most homeowners can handle early troubleshooting – but outside drains usually block because something more serious is happening under the ground. If you’ve followed the steps above and you still have a blocked drain outside your house, it’s likely caused by one of these:
And no amount of plunging or bucket-flushing will clear these more serious issues. That’s when it’s time for professional tools and licensed expertise.
How professionals unblock outdoor drains (What DIY can’t do)
A plumber approaches outdoor drain problems very differently. Instead of guessing, they use specialised equipment to see exactly what’s going on and clear even the toughest blockages.
Most professional drain clearing starts with:
A CCTV Inspection: A tiny camera is fed through the pipe to locate the blockage, identify the cause, and find out whether the pipe has structural damage. Once the problem is identified, we’ll likely do some …
High-Pressure Water Jetting: A powerful jetter blasts water at controlled pressure, cutting through roots and removing years of silt, stones and debris. It’s extremely effective – and far more powerful than any outdoor drain unblocker you can buy at a hardware store.
Pipe Relining: If the inspection shows deeper issues, such as a broken pipe or a section that has collapsed, the plumber may recommend pipe relining or repair.
These are all jobs only licensed professionals can perform. They restore the integrity of the drainage system and prevent the same problem returning again and again.
The big advantage of calling the pros is simple – they fix the root cause. DIY can help in the moment, but if the system is damaged, it will block again until the underlying issue is resolved properly.
When to call Static Plumbing
Have you tried all those safe DIY steps – and your outside drain is still blocked? Perhaps multiple drains around your home are struggling as well, which is an even clearer sign that the problem is deeper in the system and more complex than you first thought. And that’s where we come in!
And years of licensed experience to unblock outdoor drains quickly and safely.
Outside drain blocked? We diagnose the issue properly, clear the obstruction – and make sure your drainage is working the way it should. Just need your outdoor drain fixed NOW? Book a visit with Static Plumbing today and get your drains flowing again.
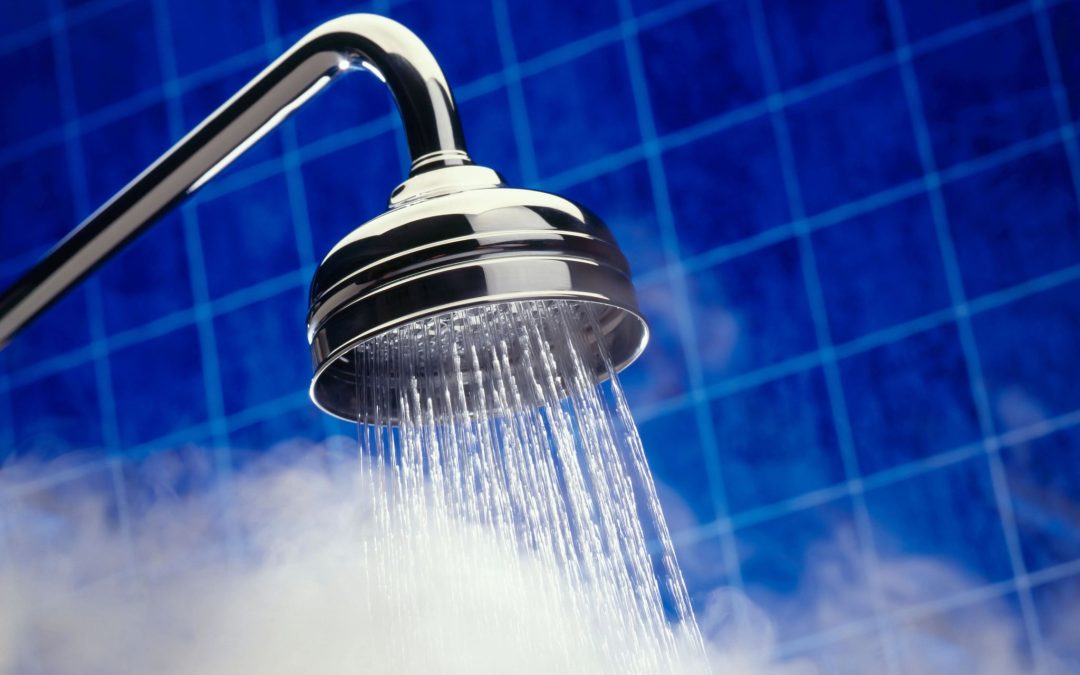
Have you ever turned on the shower and thought, “Hmm, this feels too hot … or is it?” You’re not alone – it’s a very common concern. Lots and lots of Queensland households just like yours aren’t sure what their hot water temperature should be, who sets it, or what’s actually required by Australian rules.
In the end, it’s really a big balancing act:
Hot enough to kill bacteria like Legionella in the tank
Safe enough at the tap so no one gets scalded.
So let’s walk through what’s normal, what the standards say – and a simple step-by-step way to check if your setup is safe and compliant.
What temperature should hot water be in Australia?
Let’s get the answer out of the way straight up:
In most modern homes with storage tanks, the hot water tank temperature is set to at least 60°C.
That high internal hot water temperature helps control bacteria inside the cylinder – especially when water sits in the tank for a while.
But that doesn’t mean 60°C should be coming straight out of your taps!
For bathrooms (and showers, baths and basins), Australian rules and plumbing codes expect water to be delivered much cooler at the outlet. That’s why what temperature should hot water be at the tap Australia is one of the big plumbing-related search terms that plumbers see – and the general answer is around 50°C or lower at bathroom fixtures in a standard home.
Even lower limits apply for:
Childcare
Aged care
Some other high-risk settings.
So, what temperature should a hot water system be set at? The real answer is actually split into two:
Inside the tank – typically 60°C or above
At the bathroom taps – tempered down to a safer level.
And this is exactly where tempering valves and thermostatic mixing valves come in.
How your home keeps hot water safe
In a typical Brisbane or Sunshine Coast home, domestic hot water temperature is managed in a couple of ways:
The thermostat on the unit controls the storage temperature.
A tempering valve or mixer on the outgoing line blends hot and cold before it reaches your bathroom.
So – your water heater temperature inside the unit can stay high enough for hygiene, while the actual outlet water is more skin-friendly for kids and adults.
If either part of that setup is wrong – the thermostat, the tempering valve, or the way it’s installed – you can end up with water that’s too cold to be useful or too hot to be safe!
4 Checks if you’re worried about hot water temperature
We’ve come up with a simple and practical way to approach it if you’re not sure your hot water temperature is where it should be at your place.
1. Check how the water feels at your regular taps
Start with the bathroom you use most. Let the shower or basin run for 30-60 seconds and pay attention:
Is it lukewarm even on the “hottest” setting?
Does it change randomly from one day to the next?
Does it feel dangerously hot within a few seconds?
These early impressions will tell you whether your hot water tap temperature feels roughly right – or obviously out of range.
2. Use a thermometer to see what you’re actually getting
How hot does tap water get in your home? Well, don’t guess, and instead grab a basic kitchen thermometer and hold it in a mug under the hot tap. Let the water run and watch the reading climb. This gives you a real number instead of a ‘it’s too hot’ or ‘it’s too cold’ guess.
If it pushes into scalding territory quickly, or never reaches a comfortable showering range, something in the system probably needs adjustment or repair.
3. Listen for clues from the system itself
Sometimes, the behaviour of the unit will tell you more than the numbers:
Long delays before hot water arrives
Sudden bursts of very hot, then very cold
Constant cycling or noisy operation.
These can point to issues with thermostats, elements, tempering valves – even pipework. In those cases, the problem isn’t just the hot water system temperature setting – it’s how the system is operating as a whole.
4. Call a licensed plumber to inspect and adjust safely
If you suspect your tap water temperature is too high or too low, don’t try to pull the system apart yourself. A licensed plumber can:
Test outlet temperatures properly
Confirm hot water temperature standards for your type of home
Check the condition and setting of your tempering valve
They can also explain your options if you need separate temperatures for the kitchen and bathroom – or if an older system isn’t capable of meeting current expectations.
Can you change your hot water settings?
Sometimes, yes – but it’s not always as simple as “turning it down a bit”.
Changing hot water system temperature or outlet temperatures can involve:
Adjusting the thermostat (for storage units)
Replacing or recalibrating tempering valves
Upgrading older systems that can’t reliably hold safe temperatures
Checking the network of pipes so the hot water tank temperature and outlet readings stay stable over time.
Done properly, you get hot enough water for showers, dishwashing, and washing clothes – and never flirt with dangerous scalding.
When to get professional help
Think you’ve reached the limits of your hot water temperature knowledge? You should definitely get your system checked properly if:
Kids or older family members use the shower, and the water feels dangerously hot
You’ve had a new bathroom or kitchen installed, and your domestic hot water temperature is now inconsistent
Your unit is old and has never had a proper temperature or safety check
Your shower is too cool, even with the handle fully on hot.
A fully licensed plumber can make sure your hot water tap temperature is set up correctly for everyday comfort and safety – and that your system is still compliant with current hot water temperature standards.
Need help with your hot water temperature?
Is your shower too hot? Too cold? Simply unpredictable? Our friendly team can:
Have you been Googling how to get rid of smelly drains? As the cost of living crisis really starts to bite, you’re definitely not alone. If a foul-stinking drain isn’t bad enough, it always seems to arrive at the worst time – just when you can least afford it. More and more people are seeking inexpensive DIY options before calling in a professional – and we have some good news on the smelly drain front.
Yes, mild to moderate odours really can often be cleared using simple items that cost less than $7 – and many are things you already have in the cupboard.
Why do my drains smell?
Before diving into the fixes, it helps to understand the common causes:
Why do my drains smell? If that’s your question, it’s usually a mix of bacteria, trapped debris, and stagnant water (yuck!). Luckily, the cheap tricks we’ve come up with really are the easiest, cheapest, safest and most effective ways to freshen drains – without special tools, chemicals or expertise.
7 Cheap ways to fix a smelly drain (All under $7)
We’ve done a bit of homework to check that the prices reflect real world supermarket, big store and hardware store prices in Queensland in late 2025. Sure, they might be heading higher by the day, so let’s get straight into it without further ado. If the water is slow as well as smelly, it’s also worth reading “How to unblock a drain”.
1. Boiling water flush
This one is completely FREE!
It’s also the fastest way to start cleaning a smelly drain. Pouring a full kettle of boiling water down the sink helps dissolve light fats, soap residue, and grime. It won’t fix deep issues – but it’s a great first step.
2. Baking soda & vinegar clean
Next up, the cheap and classic combo – still one of the most effective DIY ways to clean smelly drains:
Tip half a cup of bicarb into the drain
Follow with a cup of white vinegar
Cover the drain for 10 minutes
Flush with hot water.
It’s great for kitchen sinks and smelly bathroom drains alike.
COST: $1.50–$2.40 (home-brand bicarb & vinegar)
3. Dish soap & hot water degrease
For drains coated with oils, lotions, or food fat:
Squirt dish soap down the drain
Flush with very hot water.
The surfactants help break down the film that causes smelly drains.
COST: ~30 cents for 10-15 mL of the good stuff.
4. Lemon & salt scrub
This one’s ideal for bathroom basins:
Cut a lemon in half
Sprinkle salt on top
Scrub the drain area and grate.
The acidity helps clean a smelly drain while the salt acts as a mild abrasive.
COST: $1-$2.
5. Budget drain strainer or stopper replacement
Sometimes, the smell comes from the top – not inside. A worn strainer or rubber stopper traps slimy residue. Replacing it is cheap and instantly helps if the smell seems to come from the grate itself. This also helps if you’re trying to learn how to get rid of smelly drains in bathroom settings.
COST: $3–$6 at the hardware store.
6. Small enzyme cleaner (Travel size bottle)
Brisbane supermarkets now sell smaller enzyme-based drain cleaners for people wanting eco-friendlier options. These break down organic matter over a few hours and are safe for most plumbing – a good step as you learn how to clean a drain without harsh chemicals.
COST: $5–$7
7. Check & reseat the trap seal (DIY-friendly)
If you’re researching how to clean bathroom drain smells on the super-cheap, the trap seal is often the hidden culprit. A loose, dried, or poorly seated O-ring beneath the basin can let odours escape from the waste pipe even if the drain isn’t blocked. Reseating or replacing the ring costs only a few dollars and takes five minutes.
COST: $2–$5 for a new O-ring if required.
When cheap DIY fixes aren’t enough
These cheaper-than-$7 remedies are great for surface-level issues. Unfortunately, they won’t fix:
Deep blockages in the pipework that need professional drainage solutions
If your drain smells like sulphur, rotten eggs, mould, or sewage (gross!) – or the odour returns within a day or two – that usually means the cause is deeper than any budget hack can reach. In these cases, you need a fully licensed plumber to properly diagnose and clear the line using professional equipment. That’s the real answer to how to fix smelly drains when the cheap options fail.
A plumber can eliminate the source of the smell and prevent it from returning with:
It’s especially important if the issue involves smelly bathroom drains that persist despite cleaning – as these are often linked to hidden blockages or venting issues.
Need a plumber to solve a stubborn smell?
Tried the cheap fixes but the stink won’t budge? At least you didn’t blow the budget in the attempt. Luckily, our licensed team cares about your bank balance too – and we can definitely help to restore a sweet-smelling drain at your place! Static Plumbing services the Sunshine Coast, Brisbane Northside and Moreton Bay with fast, affordable drain cleaning and expert diagnosis – always with a smile.
How to get rid of drain smell? The easiest way is to book a visit – we’ll get your drains fresh and flowing again.
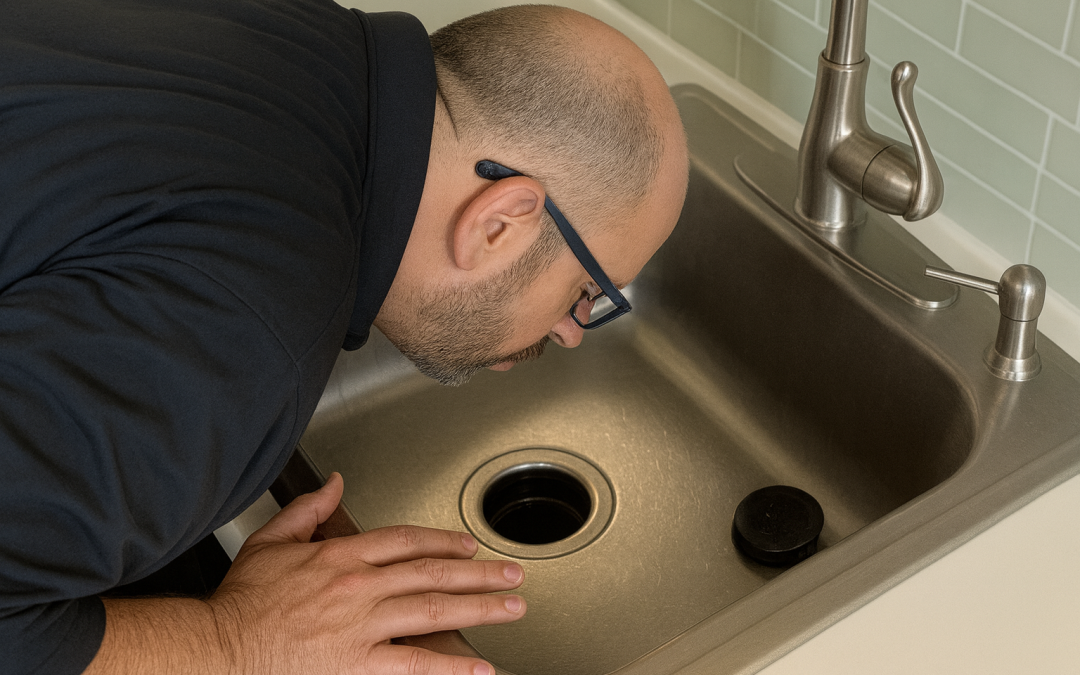
A blocked drain always seems to happen at the worst time – like right now! Have you got a sink that won’t drain or a shower pooling around your ankles? It’s at these moments that most people like you start searching for how to use a drain snake – only to realise they don’t actually have one!
Well, here’s the good news – you can still clear many blockages without professional drain cleaning tools. And if you DO have a plumber eel or drain snake, using it properly can save you a lot of frustration.
What a drain snake actually does
A drain snake (also called a plumbing auger or plumber eel) is a long, flexible cable designed to reach deep into pipes and physically break up or hook out the blockage. It’s especially useful for hair, food scraps, soap scum, or paper buildup that’s too stubborn for plunging alone.
When you turn the handle or power head, the coiled wire rotates through the pipe, scraping and twisting through whatever’s stuck until the flow is restored. Simple in design, but powerful when used right.
What if you don’t have a drain snake?
Here’s the reality of most people’s lives – their drain is blocked, but there’s no auger in sight. Luckily, a few clever substitutes can work surprisingly well for unblocking drains.
1. Try a wire coat hanger
Straighten out a wire hanger
Bend a small hook on the end.
Carefully feed it down the drain and twist gently.
This mimics how to snake a drain with an actual drain snake, grabbing hair or debris and pulling it out.
TIP: Avoid forcing it down bends – you don’t want to scratch or puncture the pipe.
2. Use a zip tie or cable tie chain
Did you know a heavy-duty zip tie can work much like a mini plumber’s eel?
Snip a few small notches along the sides to help it grip
Push and pull it through the drain to snag gunk and buildup.
It’s a trick that is particularly handy for shower and basin drains.
3. Mix baking soda & vinegar
No, it’s not a true replacement for a drain snake – but the fizzing reaction can help loosen minor buildup.
Pour half a cup of baking soda down the drain
Then one cup of vinegar
Wait 10-15 minutes
Flush with boiling water.
If it’s still slow, move to a mechanical method.
4. Try a wet/dry vacuum
If you’ve got a wet/dry shop vac, it can mimic the suction effect of snaking a drain in reverse.
Create a seal around the drain opening
Set it to liquid mode
Let it pull the obstruction out instead of pushing it through.
5. Remove & clean the trap
For kitchen or bathroom sinks:
Place a bucket underneath
Unscrew the U-shaped trap.
Most small clogs happen right there, and you’ll often find the problem without needing to use a drain snake at all.
How to use drain snake gear properly
If you DO have the real tool, here’s the simple process professionals follow when using a drain snake or plumber eel:
Feed the cable slowly: Insert the tip of the snake into the drain and turn the handle clockwise as you push forward.
Feel for resistance: When you hit the blockage, keep twisting gently. The rotation helps the cable bite into the obstruction.
Break or hook the blockage: Push and pull slightly while spinning until you feel the blockage break up or latch on.
Withdraw and clean: Slowly retract the cable while continuing to rotate, pulling debris out.
Flush with hot water: Once the snake is out, run hot water for a few minutes to clear any loosened residue.
If the blockage comes back quickly or you can’t feed the snake far enough, the issue could be deeper in the line – that’s when you’ll need a professional inspection.
What the professionals do differently
When household tools fail, professional plumbers like Static Plumbing use high-powered solutions such as:
Motorised drain snakes and eels – for deep, solid blockages in long pipe runs
CCTV drain cameras – to visually inspect and locate exactly where the blockage sits
Targeted pipe relining or repair – for cracked or collapsed sections that keep re-blocking.
These methods don’t just remove the blockage – they find out why it happened, helping you avoid repeat problems in the future.
When to stop DIY & call a plumber
After a good 20-30 minutes and your DIY attempts haven’t worked, stop torturing yourself – and don’t risk damaging the pipework. Forcing tools can make things a lot worse, like leaks, scratched pipes or a blockage that’s worse than it currently is!
Think it might be time to call a plumber?:
Repeated slow drains after clearing?
Gurgling sounds or unpleasant smells?
Multiple drains backing up at once?
Water pooling outside near drains?
Static Plumbing’s friendly licensed team offers professional blocked drain solutions using advanced equipment and industrial-grade plumber eels designed for every drain type across the Sunshine Coast and Brisbane.
Stop guessing – Get it cleared right
If you’ve tried to use a drain snake (and anything like it!) and the problem keeps returning, the issue is likely deeper down the line. But don’t stress – Static Plumbing’s Sunshine Coast plumbers, Brisbane plumbing experts, and Moreton Bay drain specialists can find and clear the cause fast, with safety and for good.
Call or book online right now for pro help from your local plumbing team.
Bailey was fantastic - very punctual and excellent at explaining what was happening and cleaning up after the job was completed. Highly recommend Static Plumbing Sunshine Coast.
Sam was super helpful, we were running into issues with our old hot water system and he came out and explained it all for us and gave some great options for service or replacement. He also fixed a leaky tap for us, great service 👍
Had a great experience with Sam - excellent communication from start to finish and incredibly helpful throughout the whole process. The work was done efficiently and to a high standard, and nothing was too much trouble. Highly recommend.
i have had Static plumbing to our home to repair a serious water leak, Samuel and team we quick on the job and described the way forward to repairs. Sam was kind enough to set up a temporary solution for us until water could be reconnected permanently. Thank you team for a great job.
I have used Static Electrics for many years. They are my preferred electricians. I saw they had added a plumbing service so decided to give them a go. Aimee handled my enquiry quickly and professionally and had a plumber booked in within days. Sam arrived bright and early and we discussed options for a new rainwater tank pump. He was back within the hour and had installed the new pump, upgraded the existing pipe work - everything perfect within a short time. Would certainly use Static Plumbing again. Great work. .
We had our hot water system replaced in Mudjimba by Static Plumbing and honestly couldn’t be happier. They got out to us really quickly, the plumber turned up on time, explained what was going on, and had everything swapped over without any hassle. He even cleaned up after himself which was a nice touch. It’s great to have a local Sunshine Coast plumbing team you can rely on would definitely recommend them.
Great service/team, Sam and static plumbing. Thank-you for the hot water installation and inspection. Definitely recommended for plumbing needs on the Sunshine Coast.
These guys are awesome, we had a blocked drain last night and Sam came out and cleared it with no worries and recommended a proper fix because we have had this issue before. I spoke to Mo as the phone and she was super helpful too great job team
Fantastic service! I live on the Sunshine Coast and needed a plumber for some small jobs around the home. I called Static Plumbing and spoke to a lovely lady on the phone who was really helpful. She arranged for their plumber to come out the very same day. He serviced my hot water system and replaced taps in my bathroom and laundry. Everything was done quickly and professionally. I couldn’t be happier with the service.
Excellent service. Helped us in Maroochydore in August 2025. Well priced, on time and Sam was a really good and honest professional. Will certainly use them again.
Needed a plumber urgently. The office was very helpful and accommodating and the plumber was great. Fast service and good workers. Highly recommend this plumbing company on the Sunshine Coast!
I can’t recommend Static Plumbers highly enough! I had a serious issue with blocked drains and they came out on extremely short notice—which was a lifesaver. From the moment they arrived, they were professional, friendly, and clearly knew exactly what they were doing.
They diagnosed the problem quickly and had everything flowing smoothly again in no time. What really impressed me was how efficient and tidy they were, leaving no mess behind. It’s rare to find a company so responsive and reliable these days, but Static Plumbers absolutely delivered.
If you’re looking for fast, honest, and top-quality plumbing work, this is the team to call. Thanks again for the fantastic service!
My Kids put some baby wipes down the toilet which essentially blocked it up meaning we couldn’t even take a bath or have showers without it backing up. Static plumbing and their team responded so quickly after hours when no one else would. I can’t thank and recommend them enough.
We ran out of hot water and called around. These guys were able to come out short notice. Our system was rusted out and leaking from the tank. The plumber gave us a few options to choose from. We went for the stainless steel tank. He was polite and cleaned up, took the old system away. From the call to replacement all done on the same day which was amazing. Fair price and good service. Great plumbing company if you’re looking for someone on the Sunshine Coast.
We had the plumber from static plumbing on the Sunshine Coast come out for a few plumbing repairs. He gave us good advice, was friendly and professional. He repaired our mixer tap and replaced our kitchen sink tap.
I had a great experience with Static Plumbing. My hot water system failed and they replaced it the same day. The plumber was punctual, professional, and explained everything clearly. The process was stress free, and the new system was installed quickly with he didn't leave any mess behind.
I wasn’t sure if my hot water system was going to need replacing, the plumber came out and was able to repair it on the spot. Really happy with the service and honest advice, quick fix. Great to deal with a team that puts the customer first. Highly recommend!
Very happy with Static Plumbing Sunshine Coast . We have used static in the past for other work. They were able to attend on short notice to replace our toilet which we were so happy because we had guests arriving. The plumber was friendly and Moana was very helpful arranging our appointment.
We had static plumbing come to our home in Buderim because our kitchen drain wasn’t draining properly. After some investigation they used their machine to clear the drain and put their camera down to check the issue. Unfortunately they found tree roots in our drain. They were able to dig the area in our yard to fix. Good service were able to do the repair on the same day. If you’re looking for a Sunshine Coast plumber I highly recommend.
Had a great experience with Static Plumbing. Our hot water service failed at the worst possible time and these guys had been suggested to me. Glad I called because they came out instantly and had the hot water back on in time for the evening. Cheers team. Will be back again.