The odd drip-drip-drip from a leaking shower head is one of those household problems that’s easy to shuffle down the priority list at first. But eventually, the drip becomes constant, your water bill starts creeping up, or the sound drives you absolutely mad when you’re trying to sleep at night. If you’ve noticed your shower head leaking, you’re definitely not alone – it’s one of the most common plumbing complaints we hear, bar none.
The good news? Sometimes the cause is extremely simple. The bad news? Sometimes it’s not – and DIY attempts can make things worse if you’re not careful.
Before we show you how to fix a leaking shower head, let’s quickly check whether you’re dealing with a basic issue you can safely handle yourself.
Does this sound like your problem?:
- Leaking shower head when water is off?
- Slow, steady leak – not a spray?
- Leaking only from the shower head, not the wall?
- No water damage or pressure changes?
If yes, you can safely keep reading. If not, skip ahead to the section about when to stop and call a plumber!
This guide is for one simple problem only
First, a warning: This guide is really only designed for the most common and simplest cause of a leaking shower head:
Namely: A worn or damaged internal washer or seal inside the shower head or tap assembly.
Washers and seals inevitably wear out over time due to water pressure, heat, mineral buildup – or simple age and wear and tear. When they fail, water continues to seep through even when the tap is fully off.
If your leak is caused by:
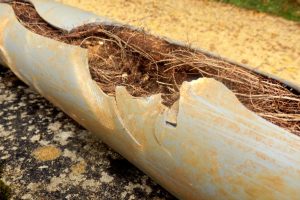
- Cracked pipework
- Faulty tap cartridges
- High water pressure
- Internal wall leaks
- Damaged fittings …
… Then this DIY fix will not solve the issue – and forcing it may create a bigger problem.
How to fix a leaking shower head (Step by step)
Even though this is considered a ‘simple’ fix, it still requires care, patience, and attention to detail. Rushing is how threads get stripped and fittings crack.
And in case you’re wondering whether you’re even allowed to change a shower head without a plumbing license, the answer is YES – as long as you’re not altering any fixed plumbing or pipework behind the wall. Once you start touching:
- Tap bodies
- Valves
- Cartridges
- Or internal pipework …
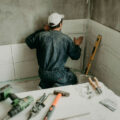
… That work needs to be done by a friendly licensed plumber.
With that said, let’s get that shower head fixed!:
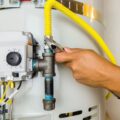
Step 1: Turn off the water properly
Shower leaking from shower head? With a bit of luck, it’s just the washer.
Before touching anything, isolate the water supply. This may be at the bathroom isolation valves or the main water shut-off for the house. Turn on the shower briefly to confirm the water is fully off.
And be warned: Skipping this step is how bathrooms get flooded.
Step 2: Protect the fittings
Place a cloth or towel over the shower head and tap fittings. This prevents scratches when using tools and helps protect chrome finishes.
Even small cosmetic damage often turns what should be a ‘quick fix’ into a regret.
Step 3: Remove the shower head carefully
Using an adjustable spanner or wrench, gently loosen the shower head by turning it anticlockwise. Do not force it. If it won’t budge easily, stop – excessive pressure can crack the fitting inside the wall.
Once loose, unscrew it by hand.
Step 4: Inspect the washer and seals
Inside the shower head connection or tap assembly, you’ll find a small rubber washer or seal. Look for:
- Flattening
- Cracks
- Brittleness
- Deformation.
Even really minor wear can cause a significant leak.
Step 5: Replace the washer
Take the old washer with you to a plumbing supply or hardware store to ensure you get an exact match. Washer sizes really matter – and close enough is never good enough.
Install the new washer carefully, making sure it sits flat and evenly.
Step 6: Clean the threads
Before reassembling, clean the threads on both the shower arm and shower head. Remove:
- The old thread tape
- All debris
- All the mineral buildup.
Wrap fresh plumber’s tape clockwise around the threads (2-3 wraps is enough).
Step 7: Reinstall the shower head
Screw the shower head back on by hand first. Only use tools for a final gentle tighten – because overtightening is a common DIY mistake that causes cracks and leaks later.
Step 8: Turn the water back on slowly
Restore the water supply, and test your newly-fixed shower. Watch closely for drips both both while it’s running and after turning it off again.
If the leak is gone – great! If not, stop right here.
When DIY stops being a good idea
Discovering a shower head leaking can look like a simple enough problem – but it so often hides a more serious issue. We regularly attend jobs where a small drip turned into:
- Stripped threads inside the wall
- Cracked fittings
- Damaged tap cartridges
- Leaks behind tiles
- Water damage that went unnoticed.
So – If the leak continues after replacing the washer with our super-simple fix, or if you notice:
- Water leaking from the wall
- Inconsistent pressure
- Leaking when taps are fully off
- Multiple fixtures affected …
… Then we’re sorry to say it, but the simple problem is no longer so ‘simple’. Understanding how to stop a shower head from leaking with this guide may be helpful for the future, but you’re going to have to read on.
What plumbers often find instead
All too often, when homeowners call us about a leaking shower head and suspect it may just need a new washer, the real cause is sometimes:
- A worn tap cartridge (not a washer)
- Excessive water pressure damaging seals
- Internal pipework issues
- Poor installation from a previous repair
- Mineral buildup affecting valves.
And these issues always require proper diagnosis and professional tools – not to mention a licensed plumber – to fix them safely and permanently.
Not sure? That’s the right time to call a plumber
Trying to save money by learning how to fix leaking shower head issues with DIY is understandable, especially these days – but water damage is expensive, and plumbing mistakes compound extremely quickly.
If your quick shower leak fix didn’t work, or if you’re unsure at any point, it’s best to stop before things escalate. Static Plumbing can quickly identify whether your leak is a simple repair or something deeper – and fix it properly the first time.
If your shower head is still leaking – or you’d rather not risk it – get in touch today for clear advice and professional help.